")
")
The professional router D-Link DSR-1000AC has the IPsec protocol, to establish virtual private networks with mobile clients (remote access VPN) and also to intercommunicate with other sites remotely (VPN Site-to-Site). This advanced router has a very complete firmware that will allow us to configure IPsec with IKEv1 or IKEv2, as well as having the possibility of configuring robust encryption and routing policies adapted to our needs. Today in RedesZone we are going to explain in detail how we must configure IPsec in a secure way to connect remotely (remote access VPN).
What is the IPsec built into the router for?
The IPsec protocol is one of the most important, used and secure VPN protocols that we can configure. IPsec will allow us to establish virtual private networks, or to connect remotely with company resources. All IPsec communications will be encrypted and authenticated, in this way, we will be providing security to the data channel and also when establishing all communications. IPsec works above the network layer, although to be able to access the IPsec service it is necessary to use the UDP 500 and 4500 protocols since they are the default ports for this type of virtual private network.
In the case of the IPsec of this professional router, we will have the possibility of configuring the router in a fairly advanced way, configuring both phase 1 and phase 2, with different types of authentication (PSK or RSA), in addition, we can upload a CA with their corresponding digital certificates for the authentication of the different clients.
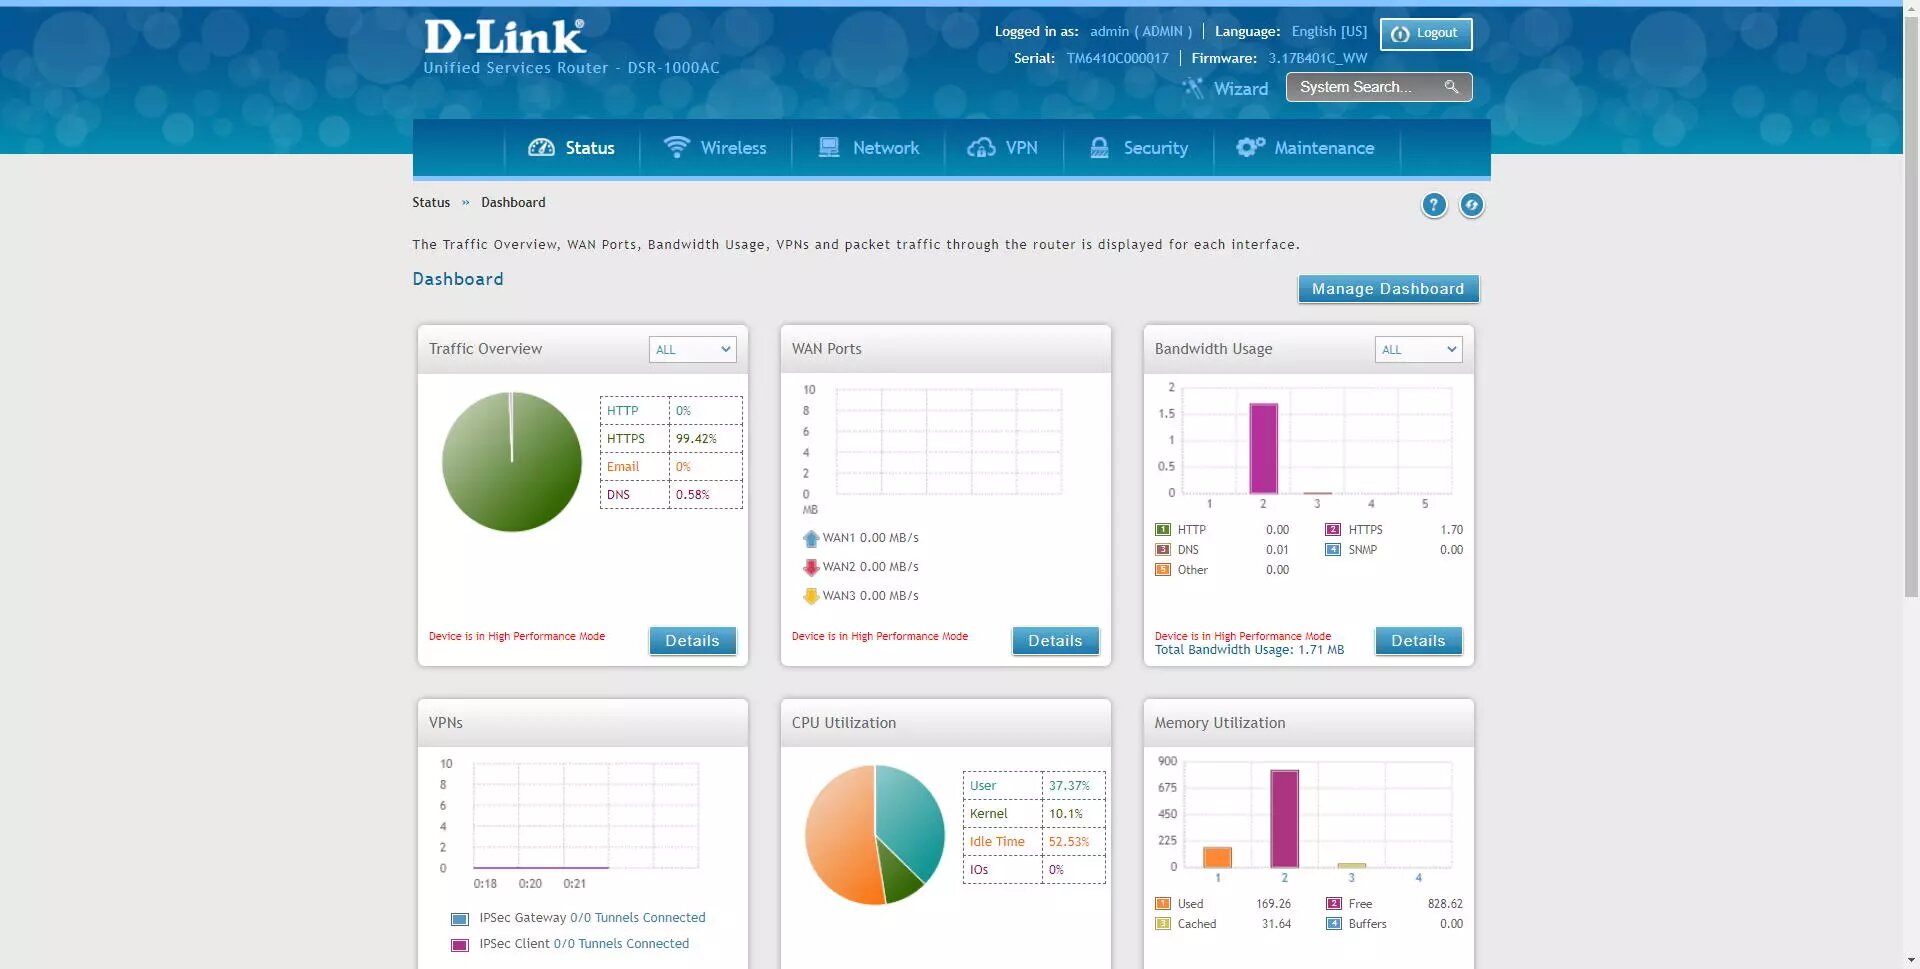
The first thing we have to do to configure the IPsec server so that the clients connect is to enter the router via https://192.168.10.1. The default username and password is "admin", but you must change the password after the first login. Once we have accessed the router firmware, we must go directly to the "VPN" section where we must go to the specific IPsec menus. Below, you can see step by step everything we have to do.
IPsec Configuration on D-Link DSR-1000AC Router
The first thing we must do to configure IPsec is to go to the "VPN / IPsec / Policies" section and a complete menu will appear where all the IPsec tunnels that we have created will be, and a button to create new IPsec tunnels to start performing VPN.
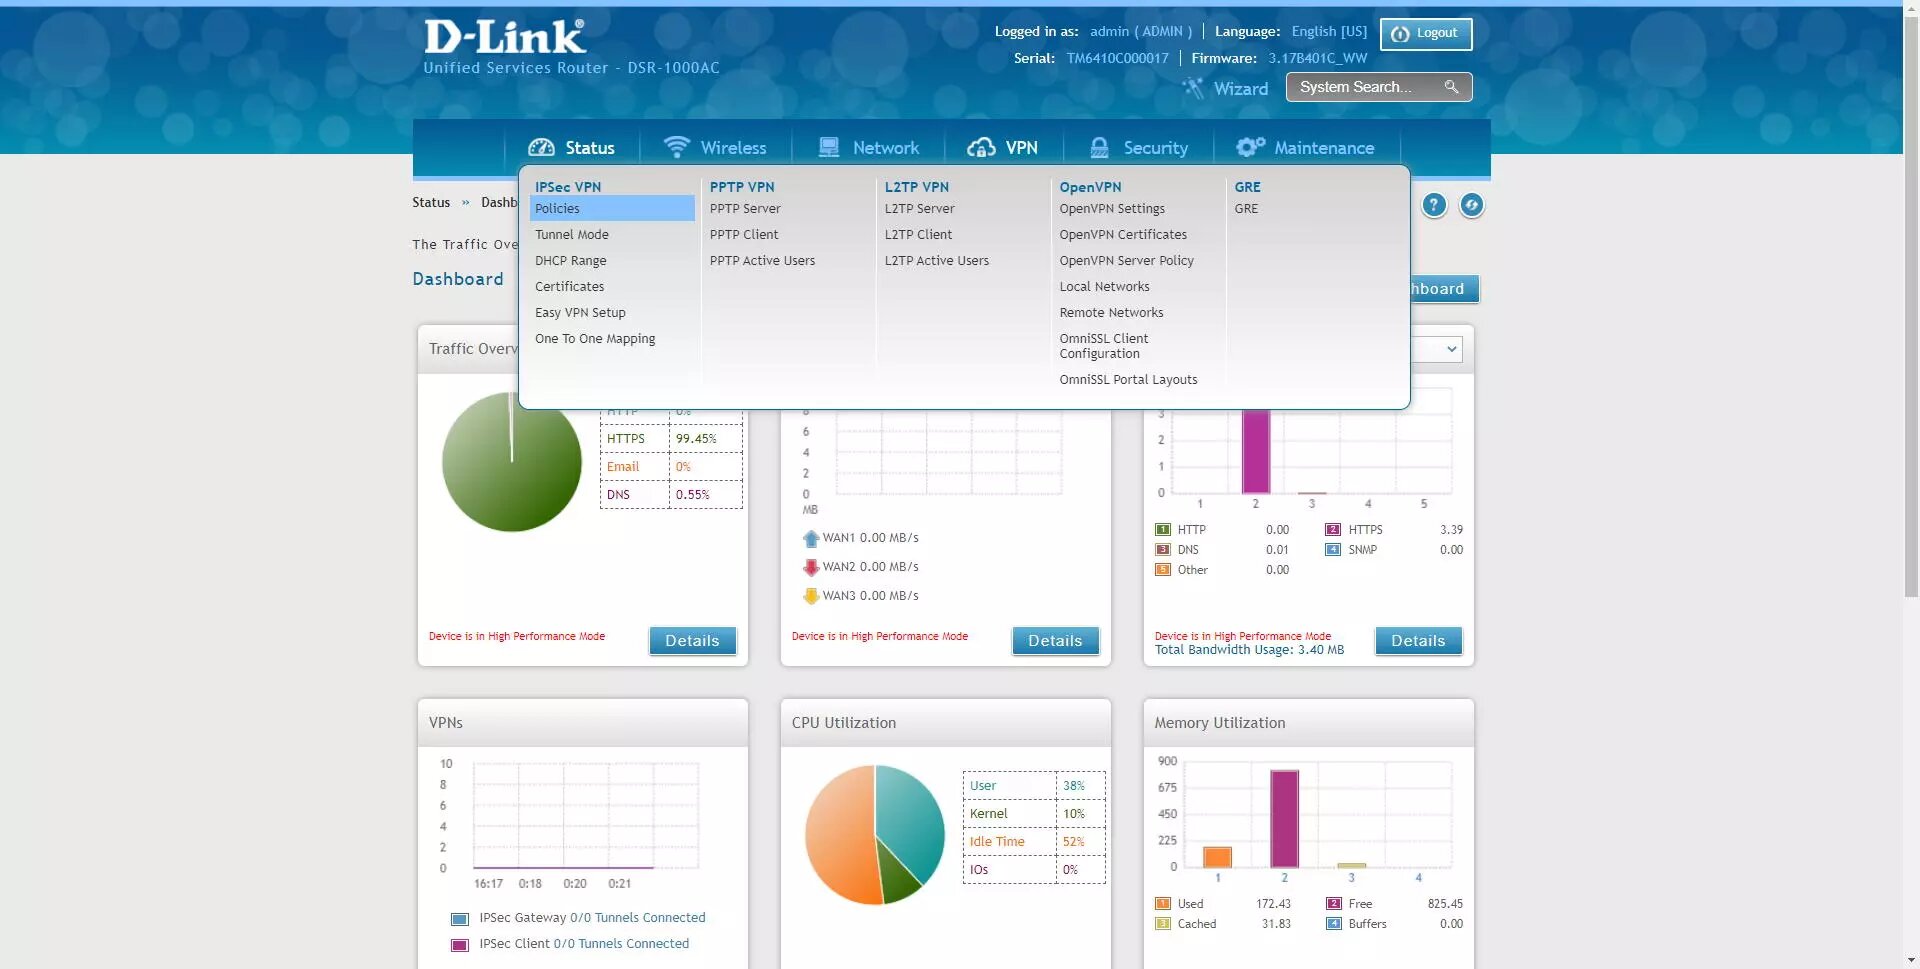
If you want to create a VPN server with IPsec to connect from Windows to the company, or to redirect traffic, we have to create a specific profile for IPsec and that is compatible with the Shrew VPN Client program, one of the most complete with respect to IPsec IKEv1 because it has all the authentication methods. In the IPsec / Policies menu, we must click on "Add New IPsec Policy".
And perform the following configuration:
-
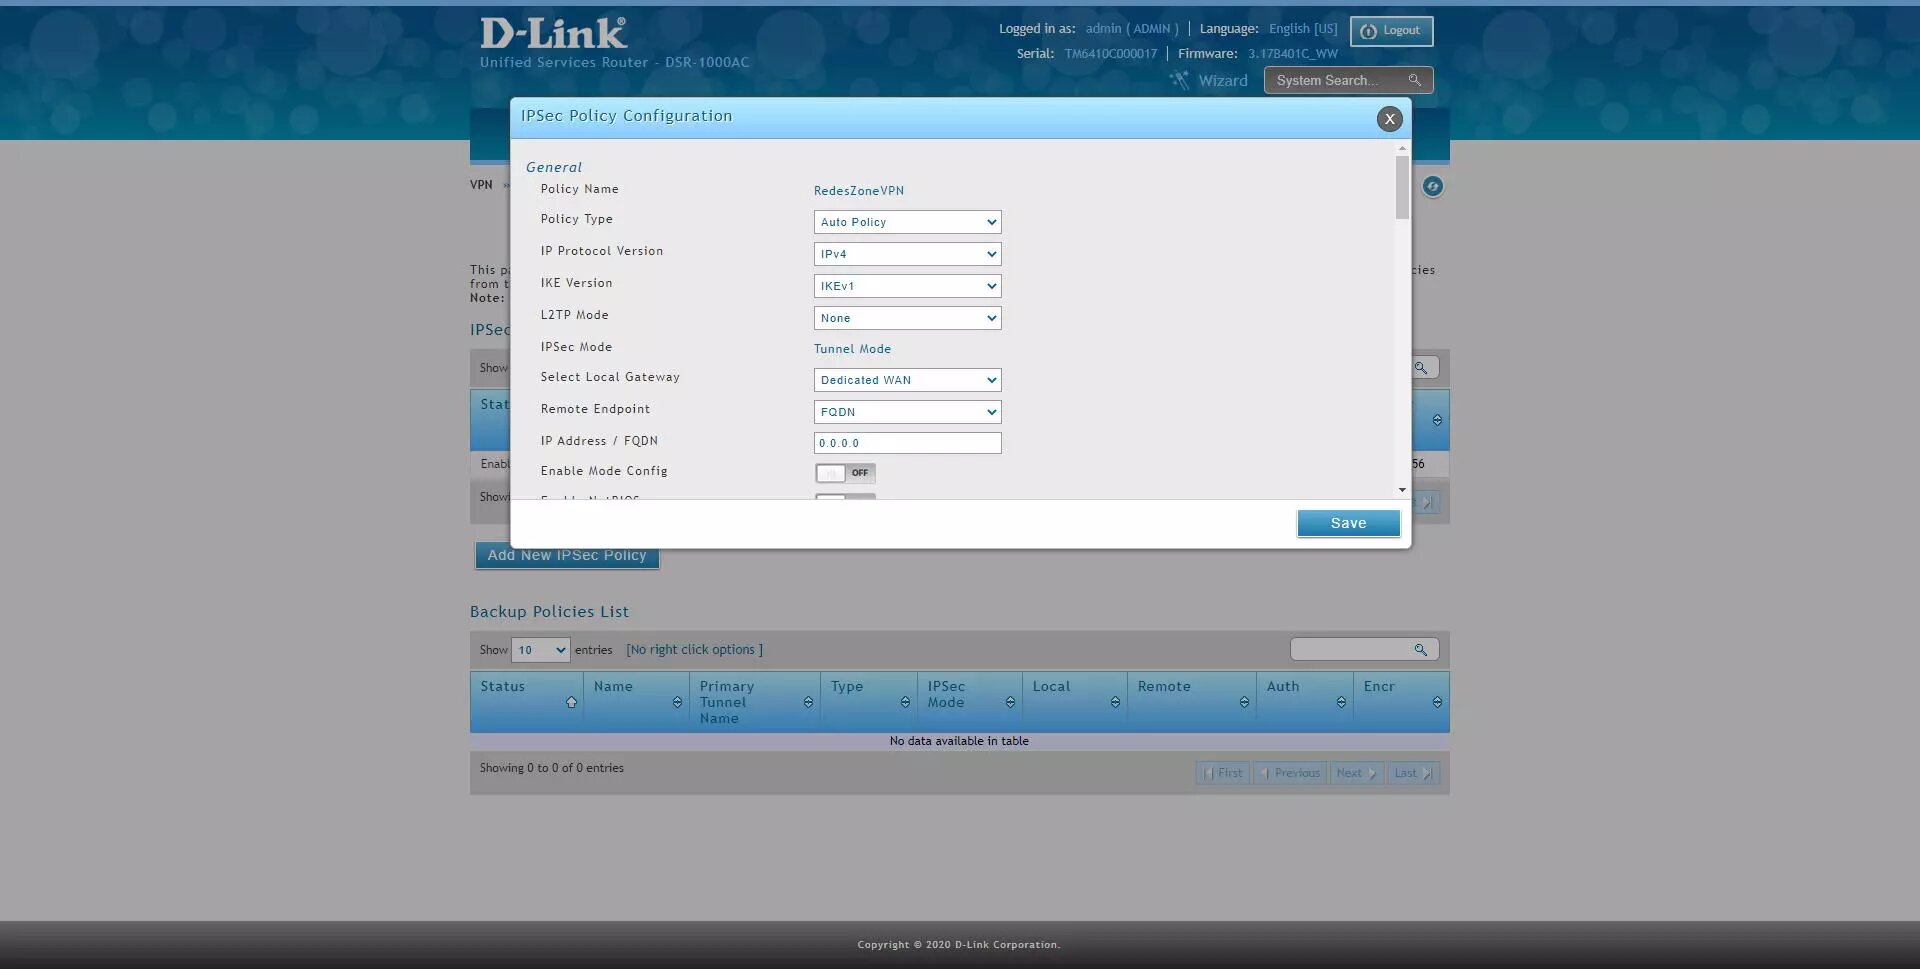
Policy Name: we give a name to the VPN profile
-
Policy Type: Auto Policy
-
IP protocol version: IPv4
-
IKE version: IKEv1
-
L2TP mode: none
-
IPsec Mode: Tunnel Mode
-
Select Local Gateway: Dedicated WAN
-
Remote Endpoint: FQDN
-
IP address / FQDN: 0.0.0.0 (this means any origin)
-
Enable mode config: OFF
-
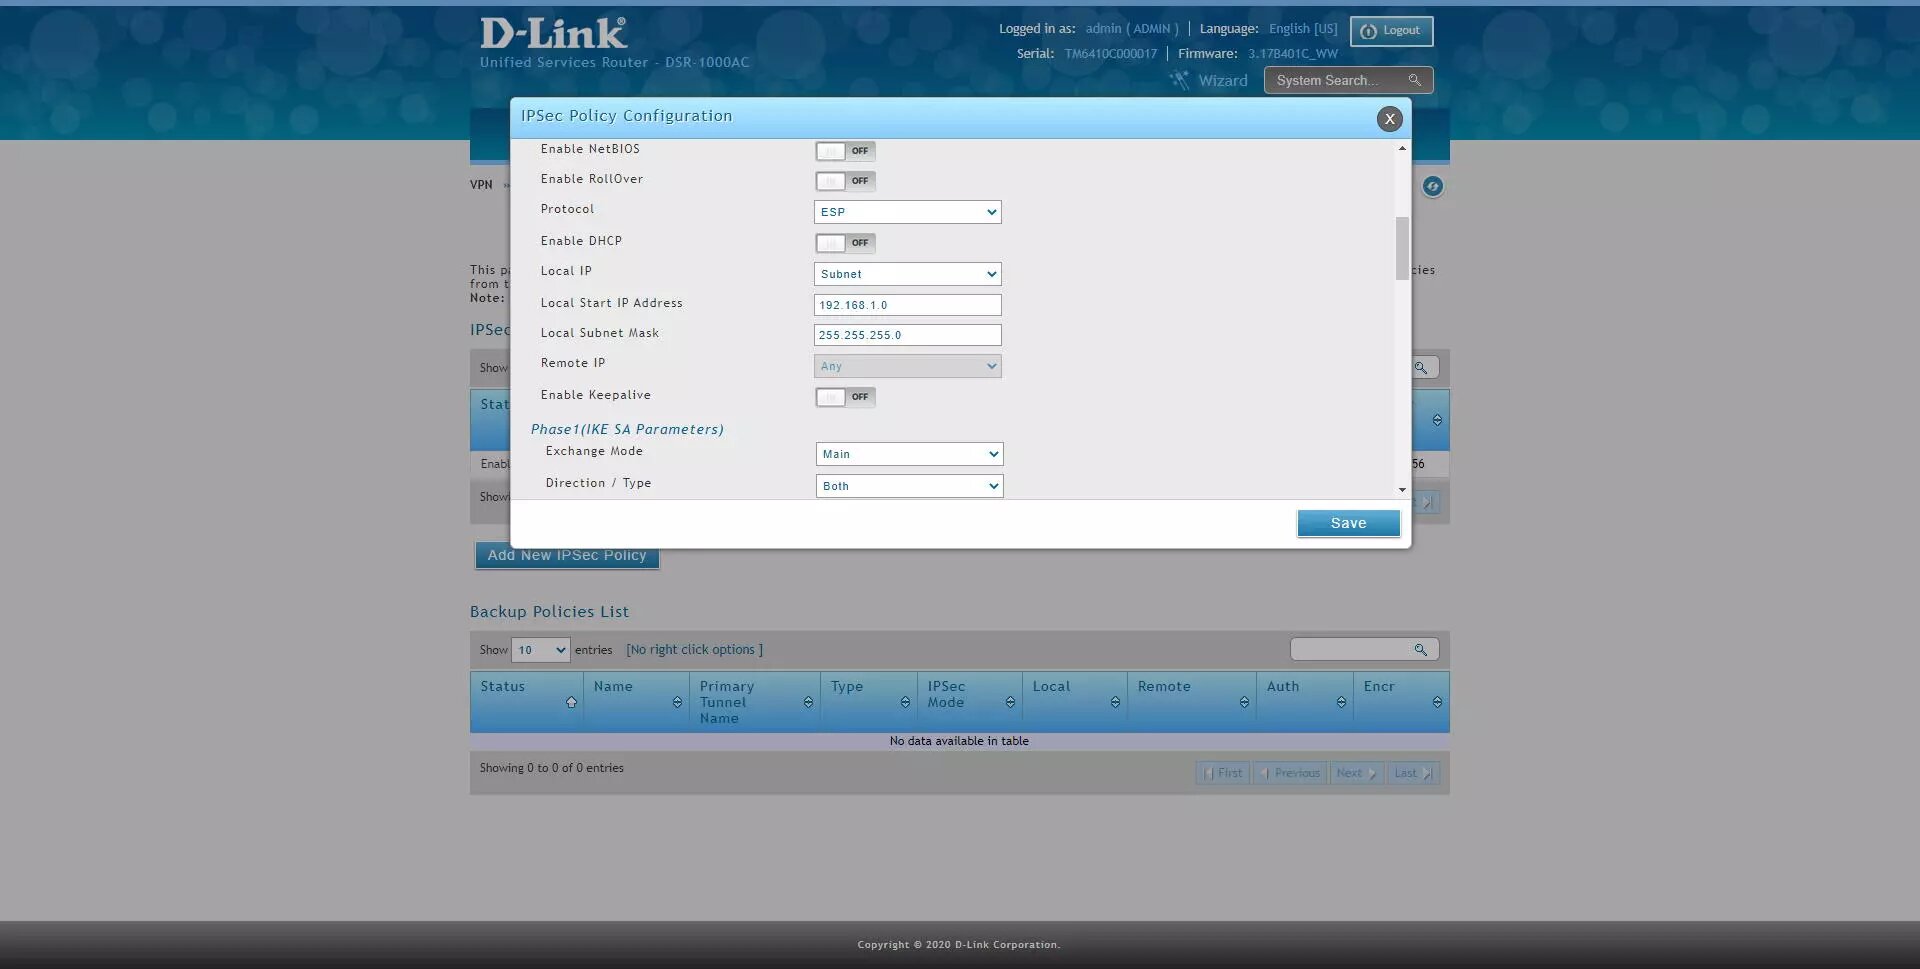
Enable NetBIOS: OFF
-
Enable RollOver: OFF
-
Protocol: ESP
-
Enable DHCP: OFF
-
Local IP: Subnet
-
Local start IP address: 192.168.1.0 (this would be our local network to share with the "remote" user)
-
Local subnet Mask: 255.255.255.0 (or whatever mask we use on this subnet)
-
Remote IP: any
-
Enable Keepalive: we can activate or deactivate it, we leave it OFF.
Once we have configured the main IPsec parameters, we now have to configure IKE phase 1 with the SA parameters.
-
Phase1 (IKE SA Parameters)
-
Exchange Mode: Main (this is very important, we put Main and not Aggresive)
-
Direction / Type: Both
-
-
Phase1 (IKE SA Parameters)
-
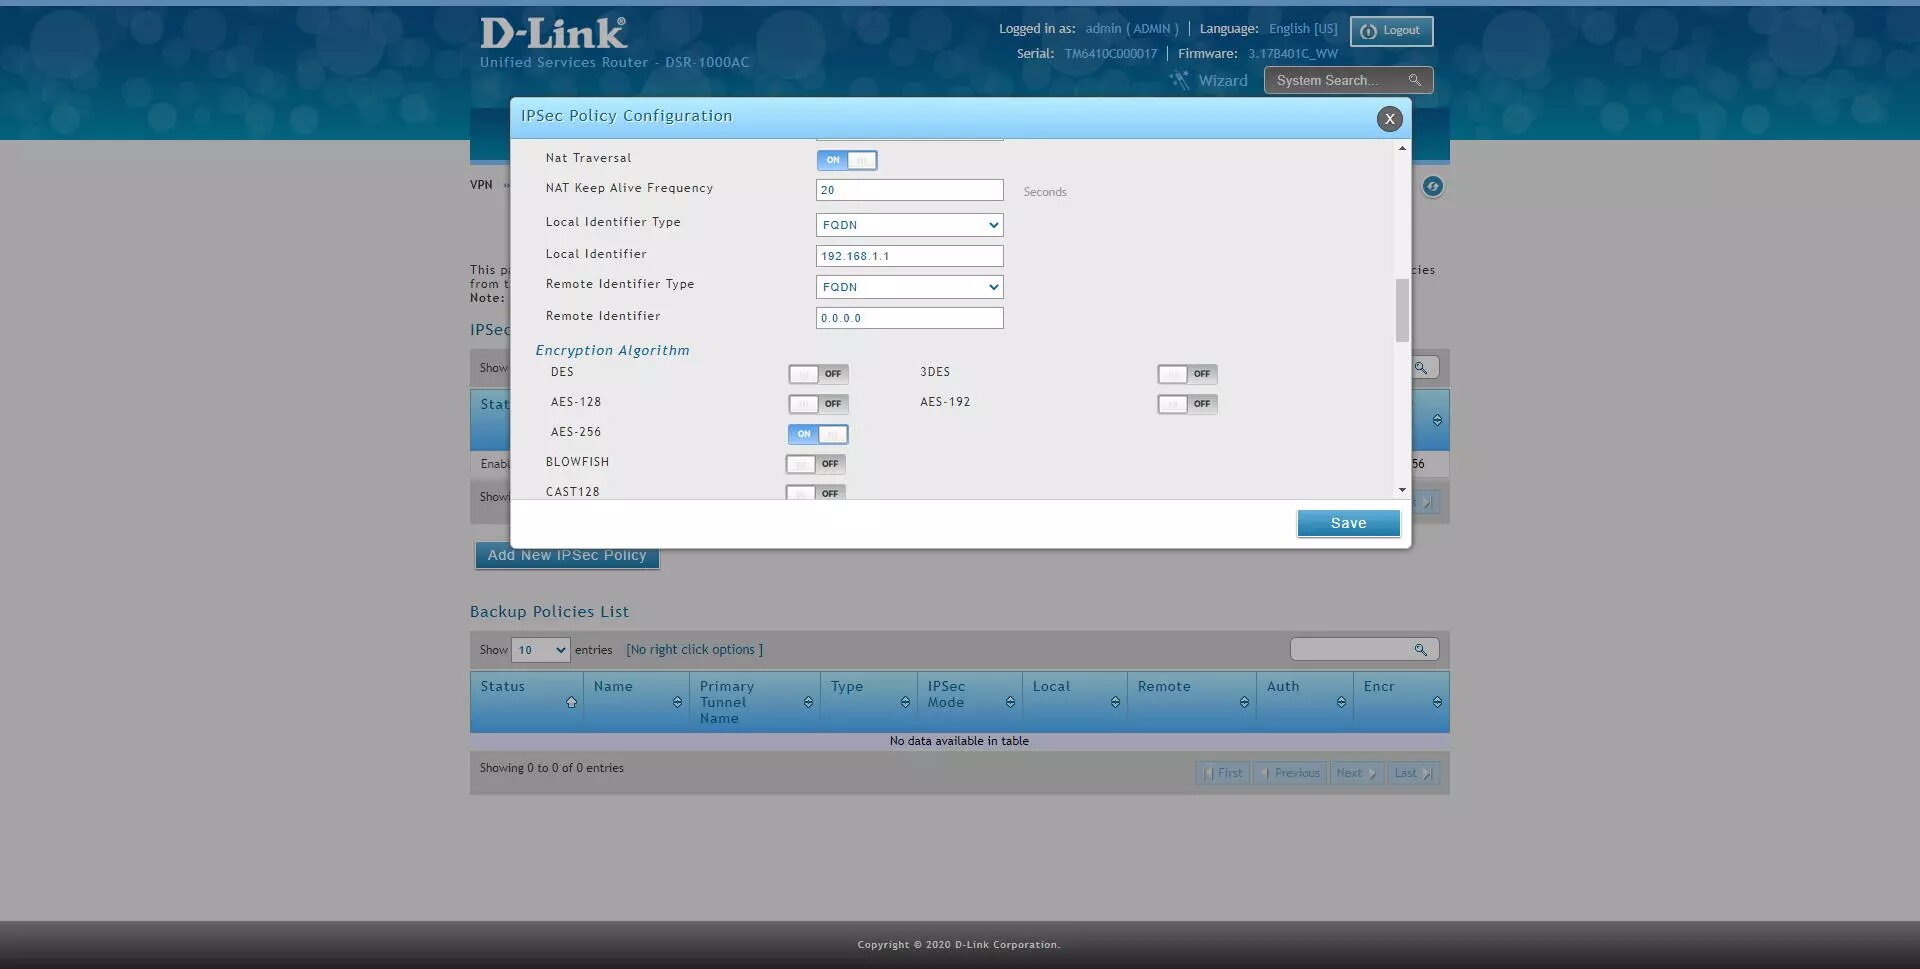
NAT Traversal: ON
-
NAT Keep Alive Frequency: 20 seconds
-
Local Identifier Type: FQDN
-
Local Identifier: 192.168.1.1 (we will have to put this later in the client's "remote identifier").
-
Remote Identifier Type: FQDN
-
Remote Identifier: 0.0.0.0 (any)
-
Encryption: enable AES-128, AES-192 and AES-256 only.
-
-
Phase1 (IKE SA Parameters)
-
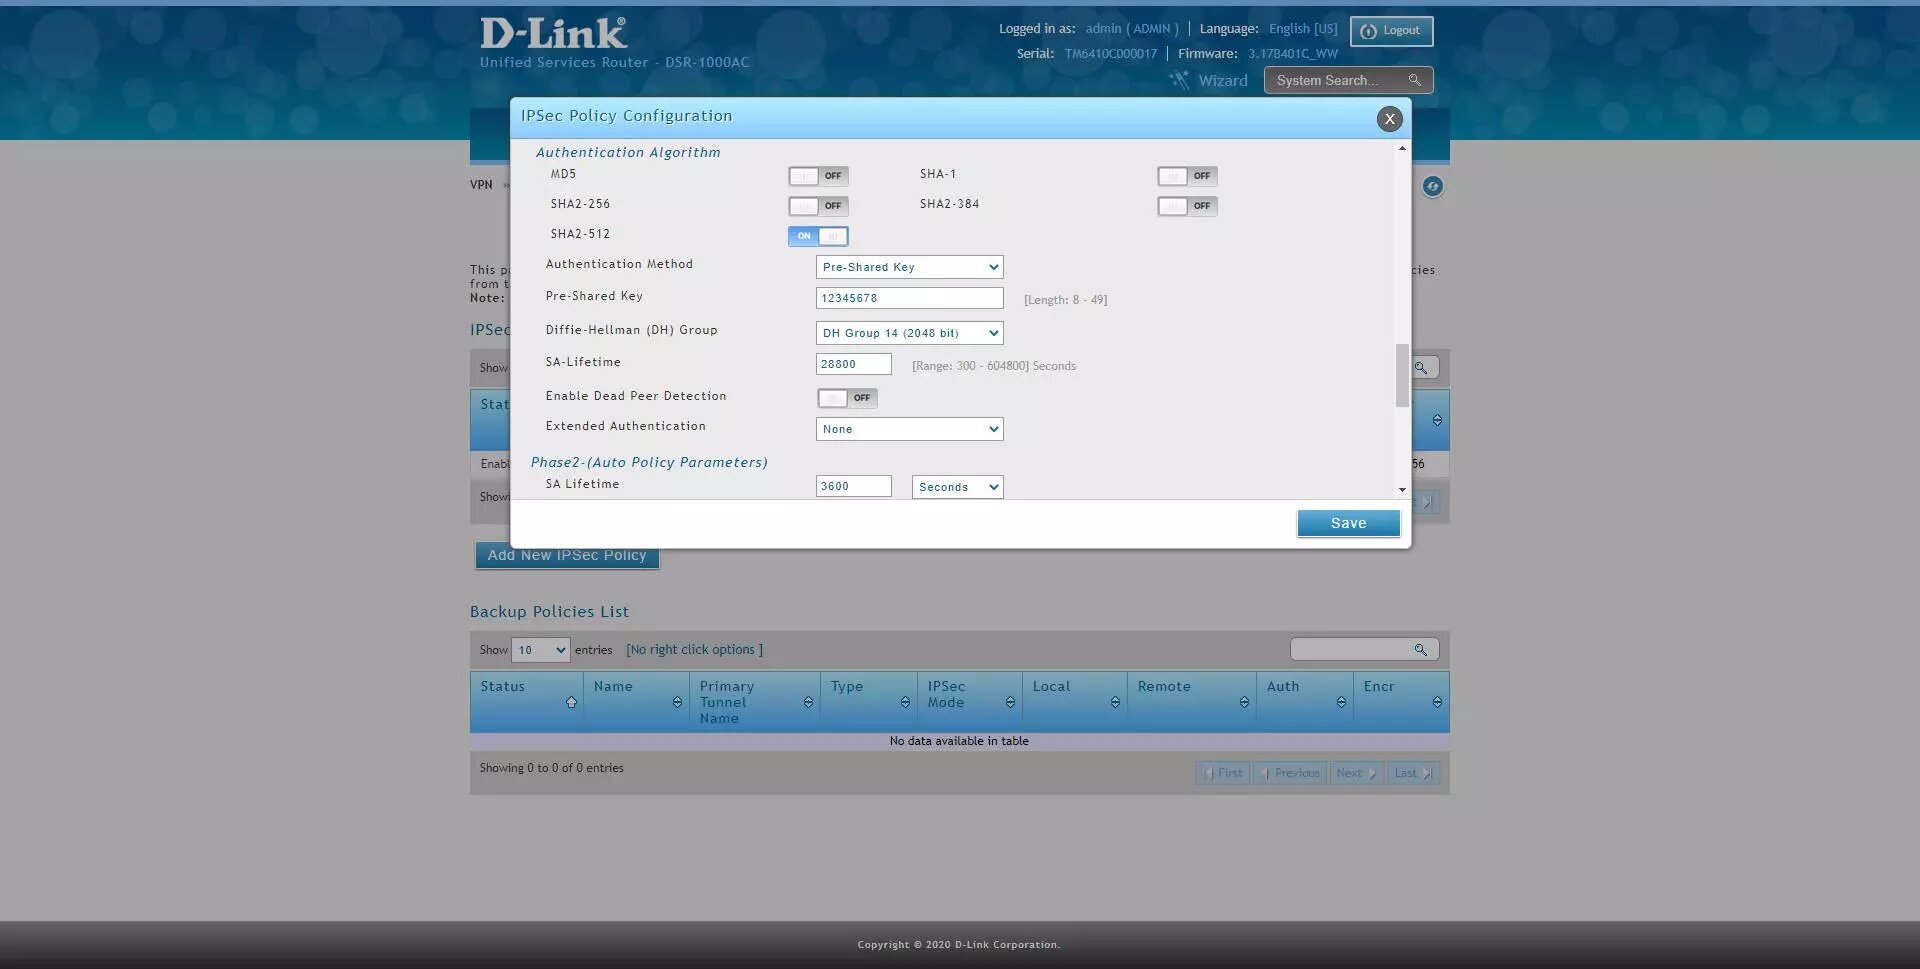
Authentication Algorithm: enable SHA2-256, SHA2-512
-
Authentication method: Pre-Shared Key
-
Pre-Shared Key: 12345678 (or whatever key you want)
-
Diffie-Hellmann Group: DH Group 14 minimum
-
SA-Lifetime: default, 28800 seconds
-
Enable Dead Peer detection: optional
-
Extended Authentication: None
-
-
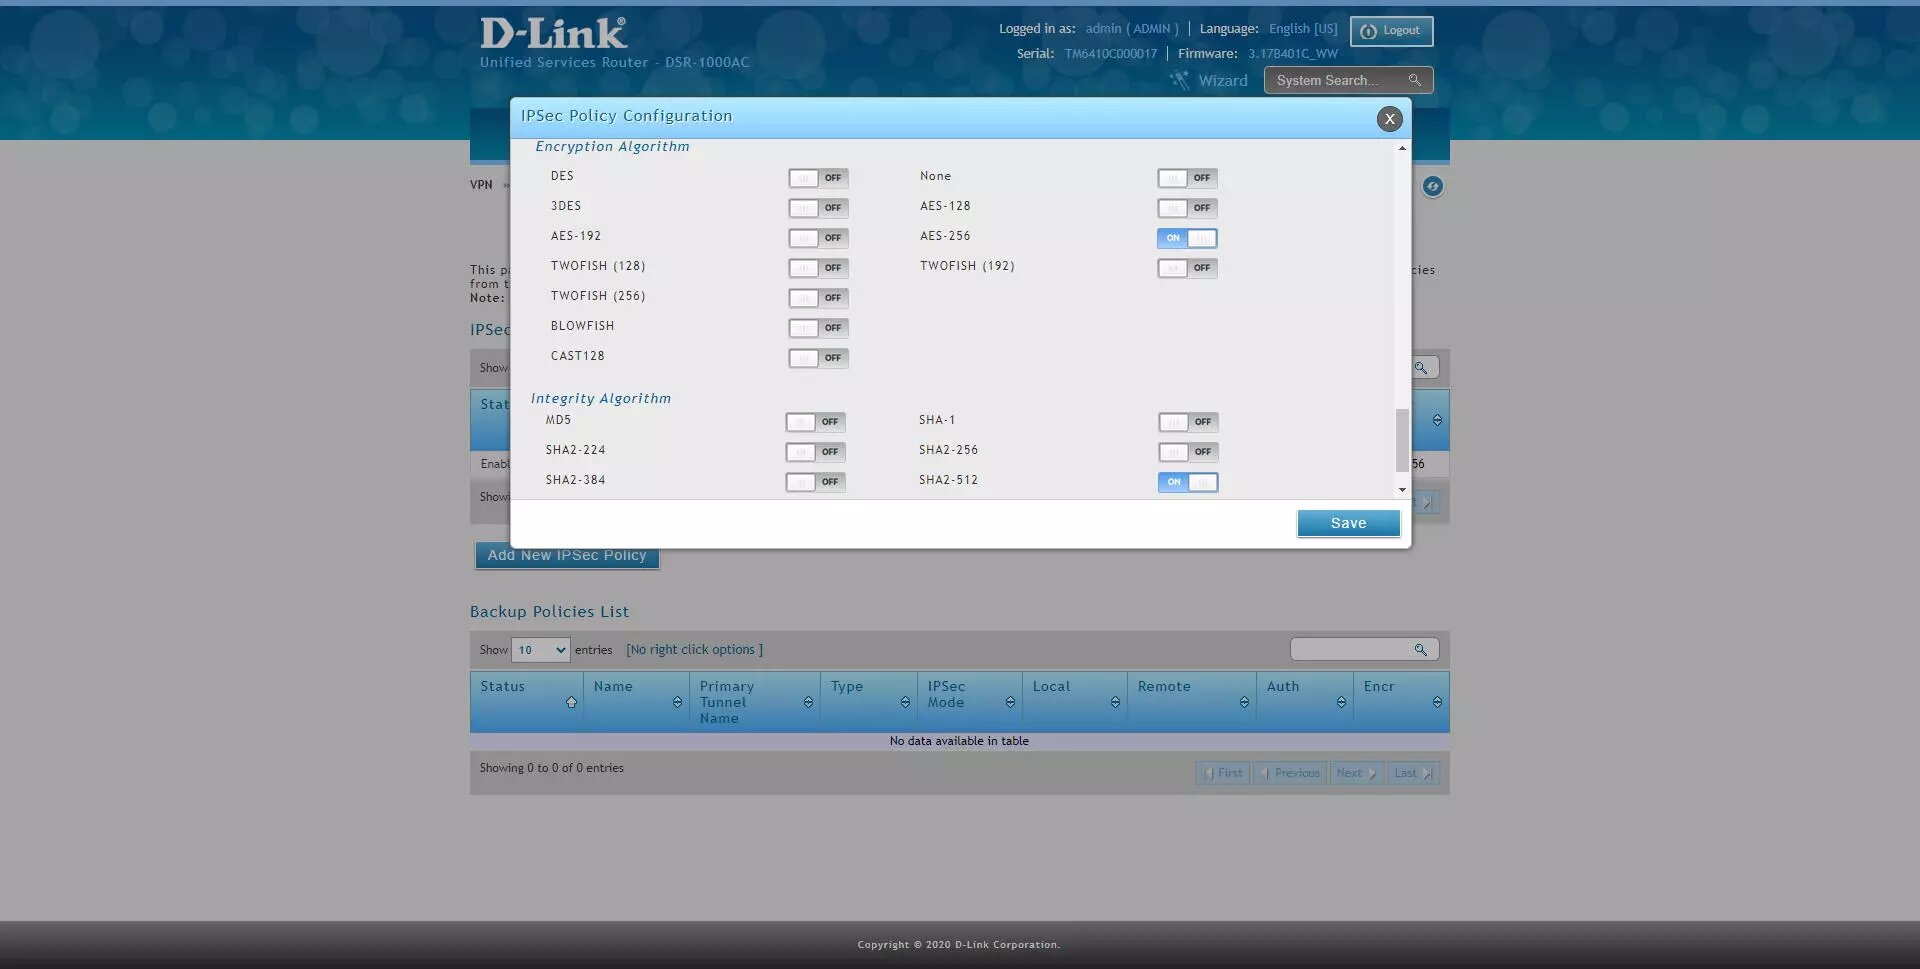
Phase2 (Auto Policy Parameters)
-
Encryption Algorithm: enable AES-128, AES-192 and AES-256, the rest do not.
-
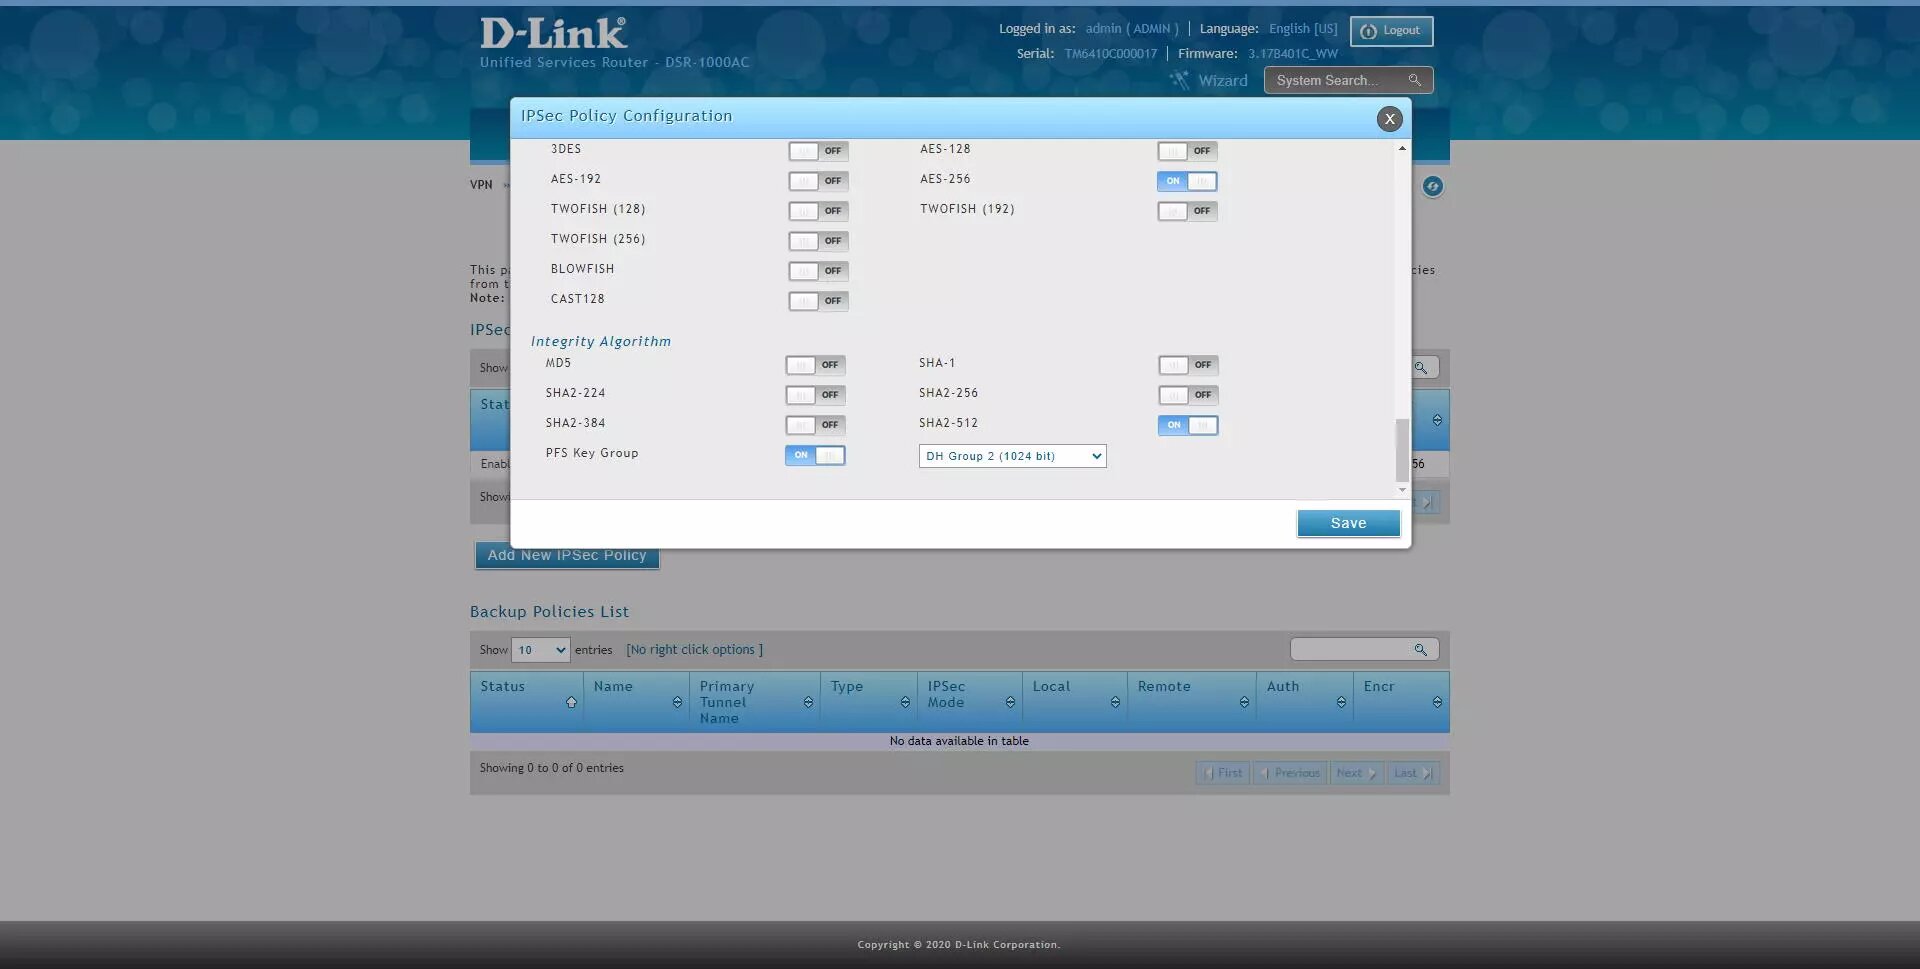
Authentication Algorithm: enable SHA2-256 or SHA2-512.
-
PFS Key Group: DH Group 2 minimum.
-
The final configuration would be the following:
Once we have correctly configured the IPsec VPN server, we now have to connect via VPN with the Shrew client for Windows.
Configuring the IPsec VPN Client with Shrew on Windows 10
The first thing we have to do is go to Shrew's official website and download the program for Windows 10, the installation of this program is like any other, and it is completely free, so we do not have to pay anything to download or use it. Once installed in our operating system, we open it and click on "Add" to add a new IPsec profile to the program.
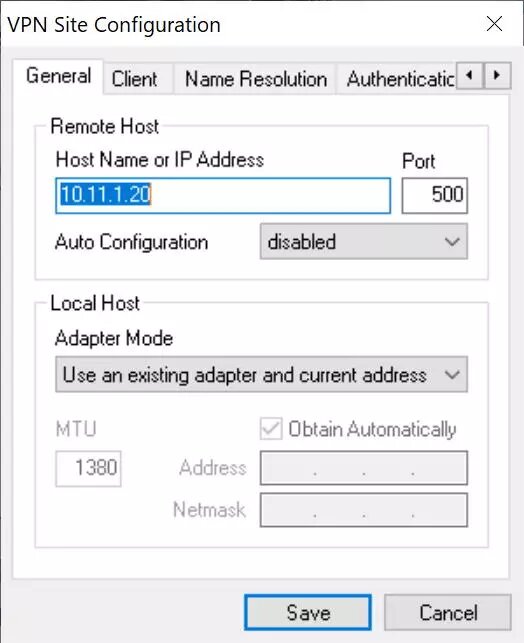
In the «General» menu we must put the following:
-
Host name or IP Address: we have to put our domain Dyn or No-IP, or directly the public IP.
-
Port: we leave it at 500
-
Auto configuration: disabled
-
Local host: Use an existing adapt and current address
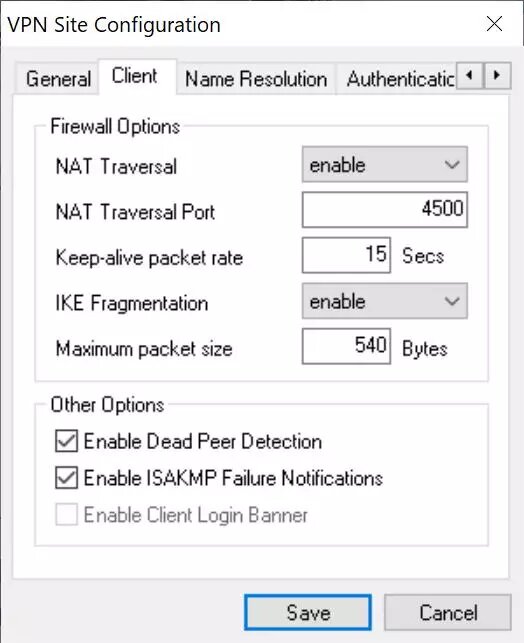
In the «Client» menu we must put the following:
-
Firewall Options:
-
NAT Traversal: enable
-
NAT Transversal Port: 4500
-
Keep-alive packet rate: 15 seconds
-
IKE Fragmentation: enable
-
Maximum packet size: 540 bytes
-
-
Other options: check both options.
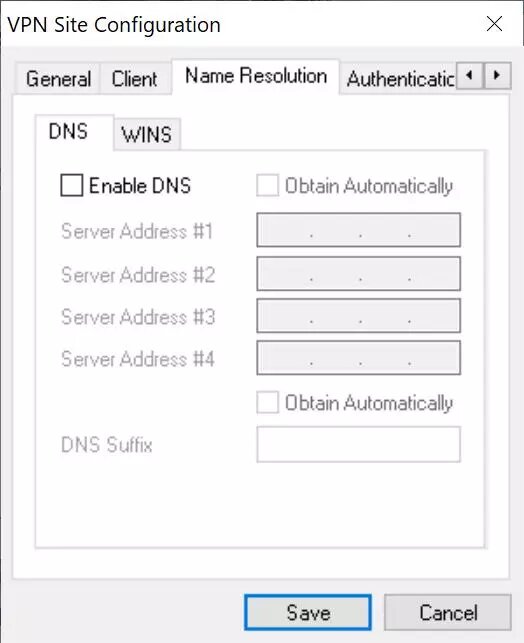
In the «Name Resolution» menu we must put the following:
-
Disable DNS and also WINS.
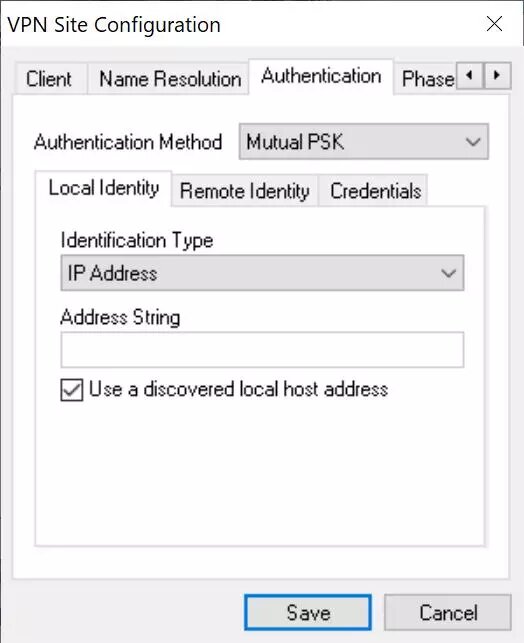
In the «Authentication» menu we must put the following:
-
Authentication method: Mutual PSK
-
Local Identity: IP address, and click on «Use a discovered local host address».
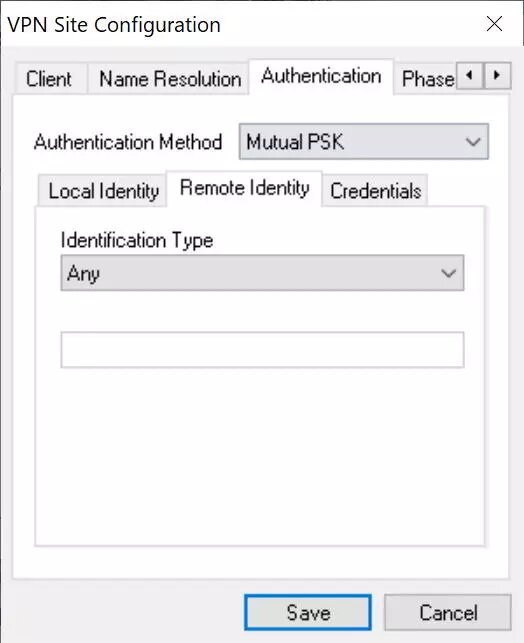
-
Remote Identity: Any.
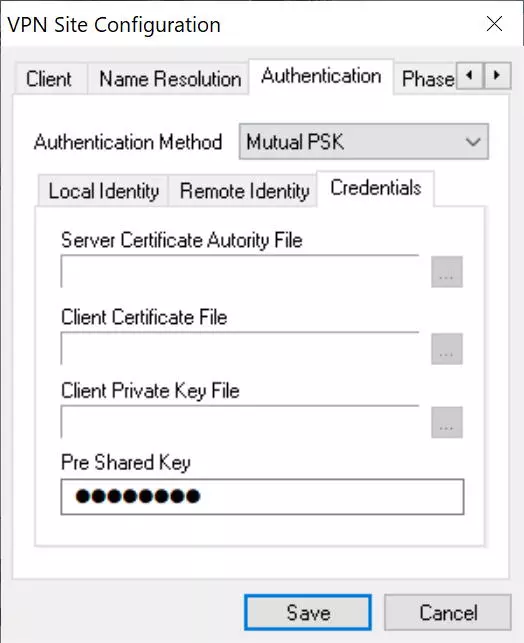
-
Credentials: we introduce the passcode (12345678) in the «Pre-shared Key» section
-
In the "Phase 1" menu we must put everything exactly the same as in the router that we have previously configured.
-
Exchange Type: main
-
DH Exchange: group 14
-
Cipher Algorithm: AES
-
Cipher Key Length 256 bits
-
Hash algorithm SHA2-512
-
Key Life Time Limit: 86400, by default.
-
Key Life Data Limit: 0, by default.
-

-
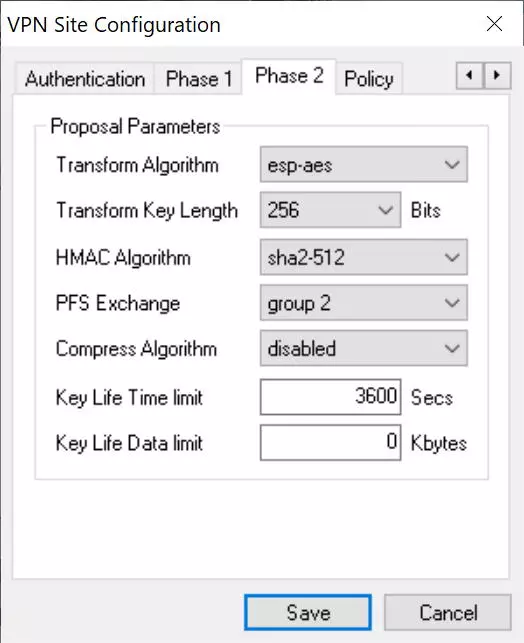
In the "Phase 2" menu we must put everything exactly the same as in the router that we have previously configured.
-
Transform Algorithm: ESP-AES
-
Transform Key Length: 256 bits
-
HMAC Algorithm: SHA2-512
-
PFS Exchange: Group 2
-
Compress Algorithm: disables for security
-
Key Life Time Limit: 3600, by default.
-
Key Life Data Limit: 0, by default.
-
-
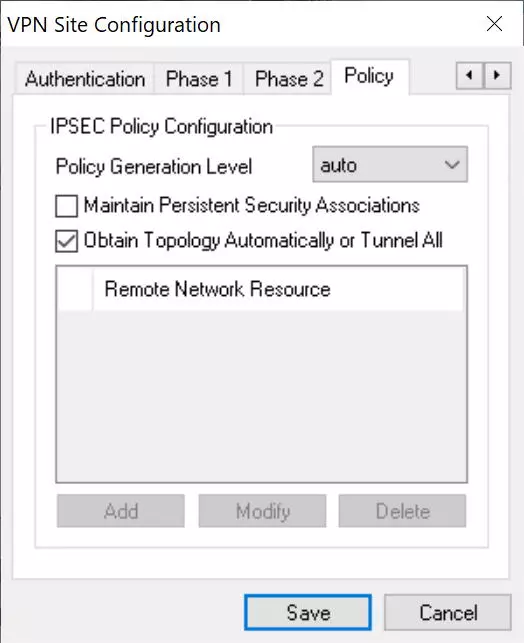
In the «Policy» menu we must put everything exactly the same as in the router that we have previously configured.
-
Policy Generation Level: auto
-
Check the option "Obtain Topology Automatically or tunnel"
-
If we want to access only the main remote network (192.168.1.0) we remove the option "Obtain Topology Automatically or tunnel" and manually put it below, clicking on "Add" and selecting "include" and the address of the subnet.
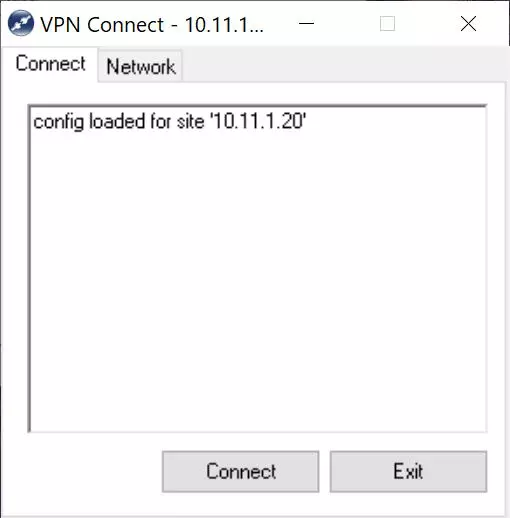
Once everything is configured, click on "Save" and we can start connecting.
To connect, we simply double click and in the «Connect» section we click on «Connect» and wait a few seconds.
A record of all the actions that are being carried out will appear, and finally it will indicate "Tunnel enabled".
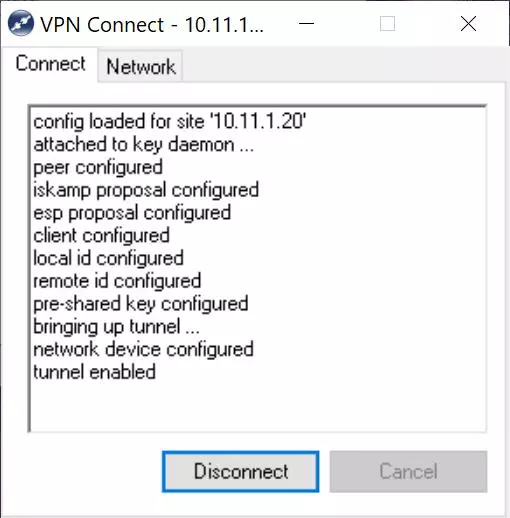
If we click on the «Network» tab, it will appear that the connection has been established correctly, as you can see here:
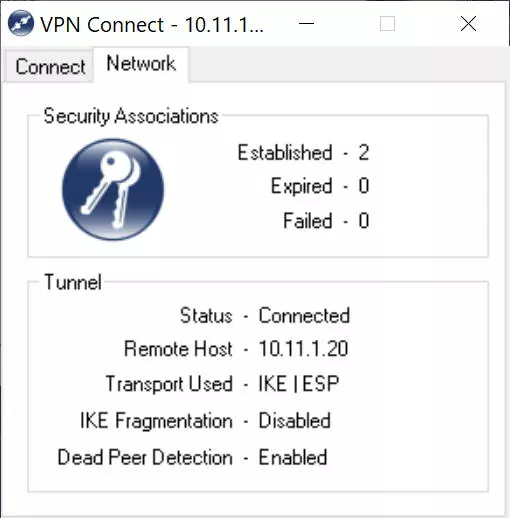
At this time we will already be securely connected to the local company or office network, thanks to the IPsec VPN protocol that we have just configured in the D-Link DSR-1000AC router. Other configurations that we could make based on this, is to configure different access policies to the different subnets, this must be done in the router itself. We could also configure an IPsec client on a mobile phone, but in these cases IPsec IKEv1 is used with xAuth, and it requires a different configuration in the router.
