")
")
NIC teaming is the aggregation or joining of two or more network links into a single logical link to provide redundancy and high availability. The logical link / interface is known as the computer interface. In the event that the active physical link goes down, one of the reserved or backup links is automatically activated and ensures an uninterrupted connection to the server.
Step 1: Install the teamd Daemon in CentOS
Teamd is the daemon that is responsible for creating a network team that will act as the logical interface during runtime. By default, it comes installed with CentOS/RHEL 8. But if, for whatever reason, it’s not installed, execute the following dnf command to install it.
$ sudo dnf install teamd
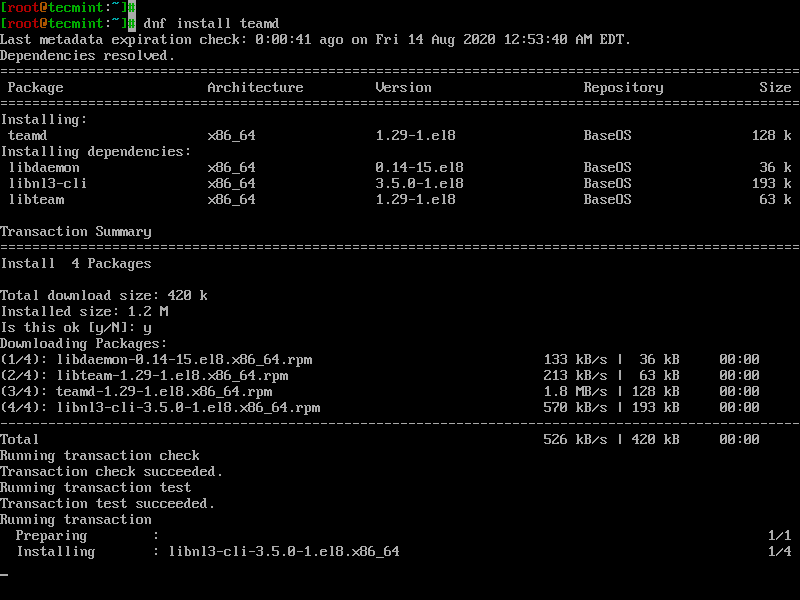
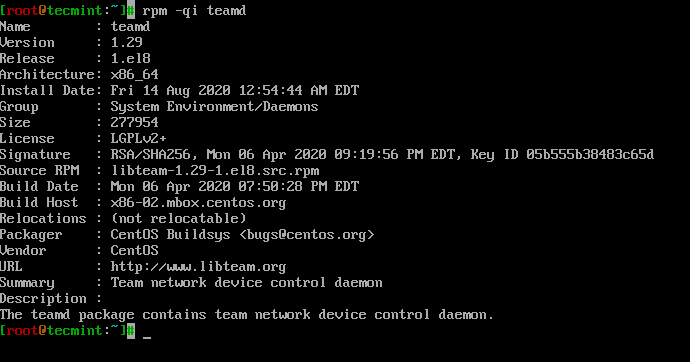
Once installed verify that teamd is installed by running the rpm command:
$ rpm -qi teamd
Step 2: Configure NIC Teaming in CentOS
To configure NIC teaming we will use the handy nmcli tool that can be used for the management of NetworkManager service. In my system, I have 2 NIC cards that I’m going to bond or combine to create a logical team interface: enp0s3 and enp0s8. This may be different in your case.
To confirm the active network interfaces run:
$ nmcli device status

The output confirms the existence of 2 active network connections. To gather more information about the interfaces like UUID, run the command:
$ nmcli connection show

To create a network teaming link or interface, which will be our logical link, we are going to delete the existing network interfaces. Thereafter we will create slave interfaces using the deleted interfaces and then associate them with the teaming link.
Using their respective UUID’s execute the commands below to delete the links:
$ nmcli connection delete e3cec54d-e791-4436-8c5f-4a48c134ad29
$ nmcli connection delete dee76b4c-9alb-4f24-a9f0-2c9574747807

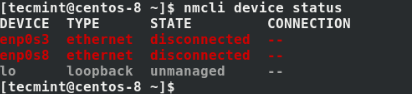
This time when you check the interfaces, you’ll notice that they are disconnected and provide no connection to the server. Basically, your server will be isolated from the rest of the network.
$ nmcli device status
Next, we are going to create a team interface called team0 in active-backup runner mode. As earlier stated, the active backup runner mode uses one active interface and reserves the others for redundancy in case the active link goes down.
$ nmcli connection add type team con-name team0 ifname team0 config '{"runner": {"name": "activebackup"}}'

To view the attributes assigned to the team0 interface run the command:
$ nmcli connection show team0
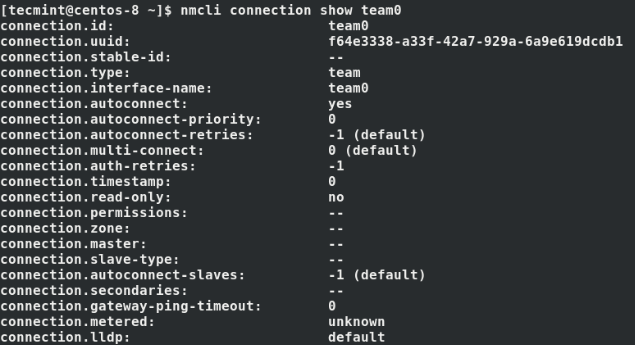
Perfect! At this point, we only have one interface up, which is the team0 interface as shown.
$ nmcli connection show
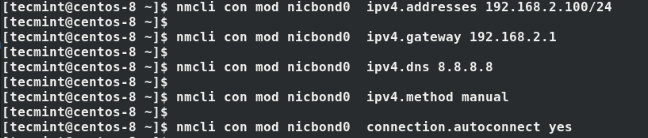
Next, configure IP address for the team0 interface as shown using the nmcli command. Be sure to assign the IP’s according to your network’s subnet & IP addressing scheme.
$ nmcli con mod team0 ipv4.addresses 192.168.2.100/24
$ nmcli con mod team0 ipv4.gateway 192.168.2.1
$ nmcli con mod team0 ipv4.dns 8.8.8.8
$ nmcli con mod team0 ipv4.method manual
$ nmcli con mod team0 connection.autoconnect yes
Thereafter, create slave links and associate the slaves to the team link:
$ nmcli con add type team-slave con-name team0-slave0 ifname enp0s3 master team0
$ nmcli con add type team-slave con-name team0-slave1 ifname enp0s8 master team0

Check the status of the links again, and you’ll notice that the slave links are now active.
$ nmcli connection show

Next, deactivate and activate the team link. This activates the connection between the slave links and the team link.
$ nmcli connection down team0 && nmcli connection up team0

Next, verify the state of the team link connection as shown.
$ ip addr show dev team0

We can see that the link is up with the correct IP addressing that we configured earlier.
To retrieve additional details about the team link, run the command:
$ sudo teamdctl team0 state
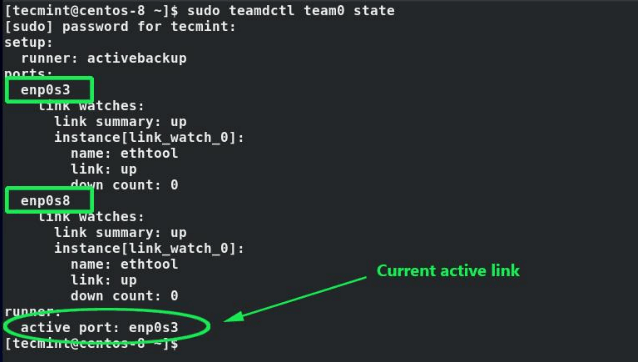
From the output, we can see that both links (enp0s3 y enp0s8) are up and that the active link is enp0s8.
Step 3: Testing Network Teaming Redundancy
To test our active-backup teaming mode, we will disconnect the currently active link – enp0s3 – and check whether the other link kicks in.
$ nmcli device disconnect enp0s3
$ sudo teamdctl team0 state
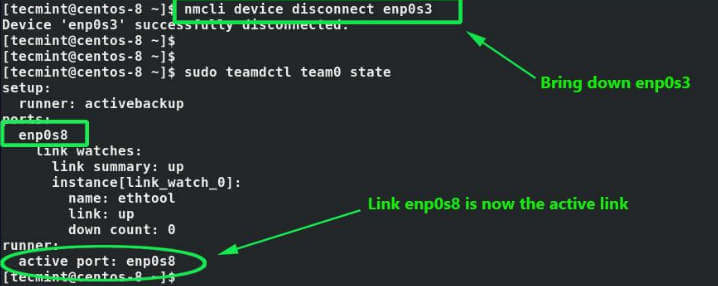
When you check the status of the teaming interface, you’ll find that the link enp0s8 has kicked in and serving connections to the server. This confirms that our setup is working!
Step 4: Deleting a Network Teaming Interface
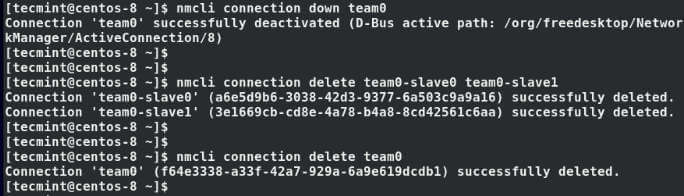
If you wish to delete the teaming interface/link and revert to default network settings, first bring down the teaming link:
$ nmcli connection down team0Next, delete the slaves.
$ nmcli connection delete team0-slave0 team0-slave1Finally, delete the teaming interface.
$ nmcli connection delete team0
At this point, all the interfaces are down and your server is not reachable. To activate your network interfaces and regain connectivity, run the commands.
$ sudo ifconfig enp0s3 up
$ sudo ifconfig enp0s8 up
$ sudo systemctl restart NetworkManager